Geopsy: Groups
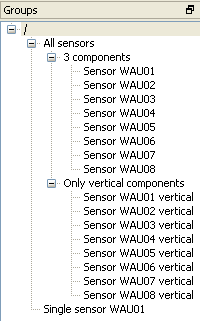
This section explains how to create and to use groups of signals. Groups are ordered lists of signals referenced by their unique signal ID. Groups are organized in a tree, hence a group has always one parent ('/' for root groups). A group with children does not own signals on its own, but owns all the signals of its children and and their descendants.
Contents
Creating a new group
First, the Group list must be displayed. If not, go to Windows menu / Tool bars and select Groups, the Group list is now displayed on the left panel.
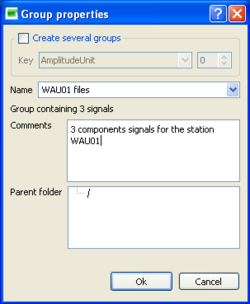
There must be an active viewer. Select New group from menu Edit. A dialog box lets you enter a name for the group and its parent. All types of names are accepted (blanks, accents, ...). Provide all required information (name and parent folder) and hit OK. The new group is added to the Groups list and appears as follow :  .
.
Note that:
- Two groups can share the same name and same parent but it is confusing for the user.
- Saving the database is mandatory to keep the group permanently.
Creating several groups
It is possible to create several groups automatically. The current viewer is browsed and a new group is created every time the Key value change. A base name containing formulas (see Set Headers) can be specified in the dialog box Name.
The properties of the first signal in the newly created group are taken in account to build the group name. Signal are not sorted before splitting in groups. It is the user responsibility to sort the signals with the correct keys.
A code:
Sensor {fn=right(Name,5);Return=fn;}
Will produce group names:
Sensor WAU01
Sensor WAU02
Sensor WAU03
Sensor WAU04
Sensor WAU05
Sensor WAU06
Sensor WAU07
Sensor WAU08
'Return' variable must be defined in the expression between {}.
Viewing groups
Groups are manipulated in the same way as files with the drag and drop mechanism.
Modifying a group
Create a viewer (e.g. a Table) with the group. Modify its content (sorting, adding new signals, ...). Select New group in menu Edit and enter the name of the existing group. The original group will be overwritten. Saving the database in this case is not necessary but strongly advised to avoid confusions with the other actions.
Organizing groups
Renaming groups
Select only one group (not the first one "All groups"). Click on the right mouse button. In the context menu select Properties. Type the new name in the dialog box Name ![]() and hit OK.
and hit OK.
Creating folders
To create a folder click right in the Group list tool bar and select New Folder. An empty folder called New Folder is created. The name of the folder can be modified following the instruction Renaming a group.
Moving groups
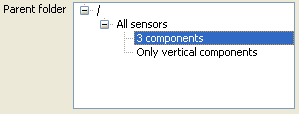
Groups are organized in a tree, hence a group has always one parent ('/' for root groups). It is always possible to modify the parent folder. To do this, click right on the group name (in the Group list tool bar), select Properties. In the dialog box Parent folder, drag & drop the name of the parent folder to the right position  .
.
Deleting groups
Select one of more groups and choose Remove from the context menu (after a right click in the "Group list"). Saving the database is mandatory if you want to save the modifications.


