Difference between revisions of "Geopsy: Table"
| Line 9: | Line 9: | ||
== Table editing == | == Table editing == | ||
| − | In order to edit directly a table, the ''lock table edition'' option in the [[Geopsy: Signal Viewer|view menu]] must not be checked off. In this mode, you can select individual cells and change their content. This mode is not suitable to [[Geopsy: Signal drag&drop|drag and drop]] signals. Return to the original lock mode to move signals to other viewers. You can edit any | + | In order to edit directly a table, the ''lock table edition'' option in the [[Geopsy: Signal Viewer|view menu]] must not be checked off. In this mode, you can select individual cells and change their content. This mode is not suitable to [[Geopsy: Signal drag&drop|drag and drop]] signals. Return to the original lock mode to move signals to other viewers. You can edit any cell, but some of them are linked to read-only fields (e.g. NSamples, the number of samples). |
To edit many cells in an efficient way with a few operation you can also refer to the Set headers option in the [[Geopsy: Edit Menu|edit menu]]. | To edit many cells in an efficient way with a few operation you can also refer to the Set headers option in the [[Geopsy: Edit Menu|edit menu]]. | ||
| − | |||
== Signal selection == | == Signal selection == | ||
Revision as of 12:20, 10 March 2010
A Table is a Signal viewer representing the metadata of a set or a subset of signals. It can be created using the View menu and then drag and drop the set of signals of interest in table. Drag and drop signals directly on the table icon in the toolbar produces the same result.
The various actions that can be performed with a subset of signals in a table are described in the following sections.
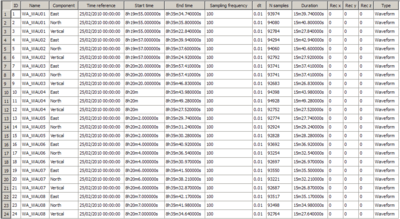
Basically, a table allows you to view and to edit the header information about signals. Each row represents a signal and each column is an information field. The default fields displayed are showed in the figure
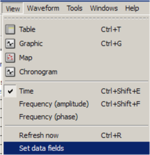
. The order and the list of displayed fields is specified by the table tab in preferences for all newly created table. If a table is open, you can also change the displayed information for the active table only by selecting item set data fields from View menu
. Columns and rows can be resized (press mouse at the limit between two columns or cells). However, automatic resizing is usually correct.
Table editing
In order to edit directly a table, the lock table edition option in the view menu must not be checked off. In this mode, you can select individual cells and change their content. This mode is not suitable to drag and drop signals. Return to the original lock mode to move signals to other viewers. You can edit any cell, but some of them are linked to read-only fields (e.g. NSamples, the number of samples). To edit many cells in an efficient way with a few operation you can also refer to the Set headers option in the edit menu.
Signal selection
It is possible to select signals directly in the table view. Signals are selected with the mouse left button. If the SHIFT key is also pressed the selection is extended from the current row to the selected row. If the CTRL key is pressed at the same time as the mouse left button, the selected row is added to the selection and becomes the current row. The current row contains the active cell. Current selection can be viewed and analyzed by means of the available tools, simply dragging and dropping them on the selected icon in the toolbar.
Exporting signals
Copy and paste action are not possible like in common tabular softwares. However, it is possible to export the information contained in a table to a text file (column separated by TABs) which can be in turn loaded in any usual tabular software. The file can be edited and imported in the table to apply the changes. Read-only fields are not affected by imports. To export a table, select export option from file menu. A combo box lets you select the export format. Select "Table" format. Enter the file name to export. A default extension (".txt") is provided for compatibility with usual tabular software. Comment are marked with '#' at the beginning of lines. Not all fields attached to a signal are exported but only the fields displayed in the active table. The list of fields is given in the first uncommented line. The field names are the standard ones given in the database description.
Importing signals
Select Import table option from file menu. The first uncommented line must contains the list of fields to modify separated by TABs. The first signal of the active table is modified according to the second uncommented line of the imported file. The second signal with the third uncommented line and so on until reaching either the last signal or the last line of the file. To avoid errors when importing files, it is better to leave the exported table active while modifying the exported file and to re-import the modified file with the same active table, to be sure that the order and the number of signals is exactly the same. In this case, never remove lines from the exported file. To limit the number of potential errors, you can remove all columns except the ones you really want to change. This method for modifying the fields of a table must be used with care and should be used only when there is no other choice. It is recommended the use of Set headers option in the edit menu.

