Difference between revisions of "Geopsy: H/V and Spectrum Toolboxes: Time Tab"
| Line 42: | Line 42: | ||
=== General sub-tab === | === General sub-tab === | ||
| − | This sub-tab contains the | + | This sub-tab contains the criteria used to select stable signal windows. |
[[Image: HV_SPEC_toolb_time_time_gen.png|thumb|left|300px|The ''General'' sub-tab in the ''Time windows'' section of the ''Time'' tab]] | [[Image: HV_SPEC_toolb_time_time_gen.png|thumb|left|300px|The ''General'' sub-tab in the ''Time windows'' section of the ''Time'' tab]] | ||
| Line 52: | Line 52: | ||
<br style="clear: both"/> | <br style="clear: both"/> | ||
| − | * | + | * '''Exactly''': all selected windows will have the same exact duration. |
Choose ''Exactly'' in the ''Length'' pop-up menu and enter the window length (in seconds) in the spin box to the right of the pop-up menu. | Choose ''Exactly'' in the ''Length'' pop-up menu and enter the window length (in seconds) in the spin box to the right of the pop-up menu. | ||
| Line 58: | Line 58: | ||
<br style="clear: both"/> | <br style="clear: both"/> | ||
| − | * | + | * '''At least''': selected windows will have a duration comprised between two values. |
Choose ''At least'' in the ''Length'' pop-up menu and enter the window lengths (in seconds) in the two spin boxes to the right of the pop-up menu. | Choose ''At least'' in the ''Length'' pop-up menu and enter the window lengths (in seconds) in the two spin boxes to the right of the pop-up menu. | ||
| − | |||
[[Image: Time-time_atleast.png|thumb|left|300px]] | [[Image: Time-time_atleast.png|thumb|left|300px]] | ||
<br style="clear: both"/> | <br style="clear: both"/> | ||
| − | This may be useful the most possible windows of very perturbated signal. | + | All windows which duration is comprised between these two values will be selected, thus possibly resulting in windows with different sizes. |
| + | |||
| + | This may be useful so as to keep the most possible windows of very perturbated signal. | ||
==== Window Overlaping ==== | ==== Window Overlaping ==== | ||
| − | It is possible for | + | It is possible for succesive windows to be contiguous or to overlap, with the ''Overlap'' box and spin box. |
| + | |||
| + | |||
* When the ''Overlap'' box is not checked, contiguous selected signal windows will not overlap. | * When the ''Overlap'' box is not checked, contiguous selected signal windows will not overlap. | ||
| Line 92: | Line 95: | ||
==== Bad Sample Definition and Use ==== | ==== Bad Sample Definition and Use ==== | ||
It is possible to discard higher amplitudes when looking for stable windows, by defining a level of "bad" samples. | It is possible to discard higher amplitudes when looking for stable windows, by defining a level of "bad" samples. | ||
| − | When a sample | + | When a sample value is above the defined "bad" sample threshold it is considered as being above the [[Geopsy: STA/LTA|STA/LTA]] threshold. |
[[Image: Time-time_Bad_sample.png|300px]] | [[Image: Time-time_Bad_sample.png|300px]] | ||
| Line 99: | Line 102: | ||
* '''Bad Sample Threshold box''' | * '''Bad Sample Threshold box''' | ||
| − | It is possible to define a level above which a sample is considered as bad, i.e. that should rejected when defining stable windows. | + | It is possible to define a level above which a sample is considered as bad, i.e. that should be rejected when defining stable windows. |
| + | |||
| + | To do so, check the ''Bad sample threshold'' box and enter the desired threshold in the spin box. The threshold is the percentage of the maximum amplitude observed over the entire signal. | ||
| − | |||
* '''Bad Sample Tolerance box''' | * '''Bad Sample Tolerance box''' | ||
| − | A maximum number of bad samples may be accepted inside windows during the selection process. | + | A maximum number of bad samples may be accepted (tolerated) inside windows during the selection process. |
| − | Check the Bad sample tolerance button and enter the | + | Check the ''Bad sample tolerance'' button, and enter the maximum cumulative time (in seconds) reached by all the bad sample that is accepted in selected windows. |
| − | This option may only be used when the previous | + | |
| + | This option may only be used when the previous option (''Bad sample threshold'') is checked. | ||
<br style="clear: both"/> | <br style="clear: both"/> | ||
| − | ==== Anti-triggering | + | ==== Anti-triggering alternatives and criteria for window selection ==== |
The goal of the anti-triggering is to keep the most stationary parts of ambient vibrations, and to avoid the transients. Eventualy, user's defined bad sample are also considered as part of the non-stationary signal. | The goal of the anti-triggering is to keep the most stationary parts of ambient vibrations, and to avoid the transients. Eventualy, user's defined bad sample are also considered as part of the non-stationary signal. | ||
| − | Two types of anti- | + | Two types of anti-triggers may be applied to he signal, both based on [[Geopsy: STA/LTA|STA/LTA]] detection. |
[[Image: Time-time_antitriggering.png|300px]] | [[Image: Time-time_antitriggering.png|300px]] | ||
| − | * Anti-triggering on raw signal | + | |
| + | * '''Anti-triggering on raw signal''' | ||
When the ''Anti-triggering on raw signal'' box is checked, the anti-trigger is applied sample per sample all along the entire signal, using the [[Geopsy: STA/LTA|STA/LTA]] parameters entered in the ''Raw signal'' sub-tab. | When the ''Anti-triggering on raw signal'' box is checked, the anti-trigger is applied sample per sample all along the entire signal, using the [[Geopsy: STA/LTA|STA/LTA]] parameters entered in the ''Raw signal'' sub-tab. | ||
| − | * Anti-triggering on filtered signal | + | |
| + | * '''Anti-triggering on filtered signal''' | ||
When the ''Anti-triggering on filtered signal'' box is checked, the signal is first filtered using the parameters entered in the ''Filter'' sub-tab, and then the anti-trigger is applied sample per sample all along the entire signal, using the [[Geopsy: STA/LTA|STA/LTA]] parameters entered in the ''Filtered signal'' sub-tab. | When the ''Anti-triggering on filtered signal'' box is checked, the signal is first filtered using the parameters entered in the ''Filter'' sub-tab, and then the anti-trigger is applied sample per sample all along the entire signal, using the [[Geopsy: STA/LTA|STA/LTA]] parameters entered in the ''Filtered signal'' sub-tab. | ||
| − | All | + | All combinations of box checking are possible, including both boxes unchecked or checked. In the latter case only samples that fullfill the criteria of both antitriggers are considered as part of a stable signal. When none are checked no anti-trigger is apllied in the window selection. |
| + | |||
| + | It is thus possible to select windows based on the ''Bad Sample'' criteria only, or even no criteria. | ||
IMPORTANT NOTICE: when using the anti-triggering on the filtered signal, the signal is filtered ONLY to select stable windows. | IMPORTANT NOTICE: when using the anti-triggering on the filtered signal, the signal is filtered ONLY to select stable windows. | ||
Revision as of 13:39, 11 March 2010
Use
This toolbox tab contains the parameters to select the part of the signal used for H/V or Spectrum processing on which window selection is performed. The two series of paramaters are described in two sections:
- the global time range section
- the time windows section
A third section gives information on the number of selected windows obtained after applying to the signal the parameters of the two precedent sections.
At the very bottom two buttons indicate wether to load parameters from previouly processed data or to start signal processing signal processing.
Global time range section
Used to select the portion of the signal that will be processed (more informations).
Time windows section
Short-duration disturbances of the signal can be avoided during H/V or Spectrum processing by using an anti-trigger window selection to remove the transients. The objective is to keep the most stationary parts of ambient vibrations, and to avoid the transients often associated with specific sources (footsteps, close traffic). This objective is exactly the opposite of the usual goal of seismologists who want to detect signals, and have developed specific trigger algorithm to track the unusual transients possibly indicating the satrt of an earthquake. Here an anti-trigger algorithm is used, which is exactly the opposite: it detects transients but it tries to avoid them. For more information on this topic it it suggested to consult the SESAME user guidelines [1]. Windows are then processed indidualy to get individual window H/V or Spectrum, which are then averaged.
This section comprises four sub-tabs:
- general: window selection parameters
- raw signal: STA/LTA crieria applied to the raw signal
- filter: filtering criteria for applying STA/LTA on the filtered signal
- filtered signal: STA/LTA crieria applied to the signal filtered uusing the criteria in the Filter sub-tab
General sub-tab
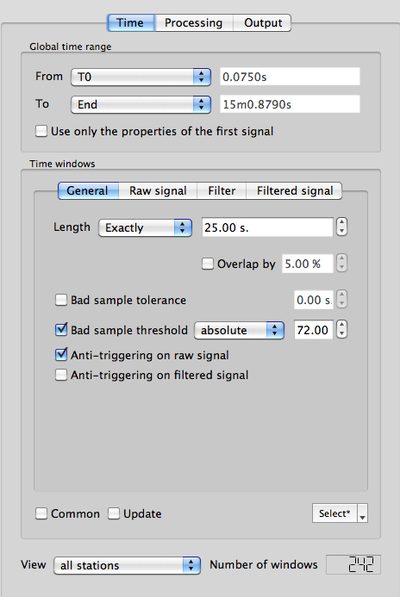
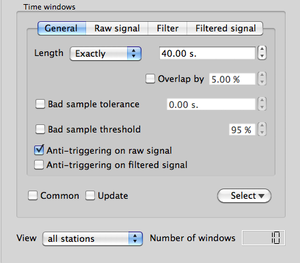
This sub-tab contains the criteria used to select stable signal windows.
Window length
There are three ways to define window length (duration, in seconds) using the Length pop-up menu
- Exactly: all selected windows will have the same exact duration.
Choose Exactly in the Length pop-up menu and enter the window length (in seconds) in the spin box to the right of the pop-up menu.
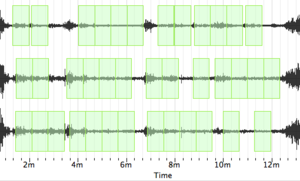
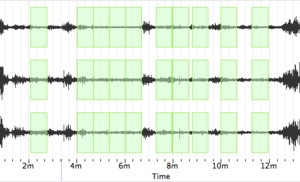
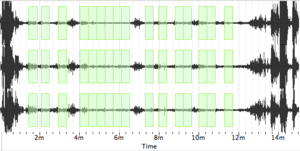
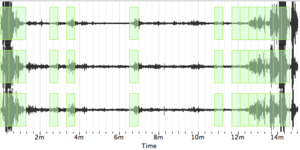
- At least: selected windows will have a duration comprised between two values.
Choose At least in the Length pop-up menu and enter the window lengths (in seconds) in the two spin boxes to the right of the pop-up menu.
All windows which duration is comprised between these two values will be selected, thus possibly resulting in windows with different sizes.
This may be useful so as to keep the most possible windows of very perturbated signal.
Window Overlaping
It is possible for succesive windows to be contiguous or to overlap, with the Overlap box and spin box.
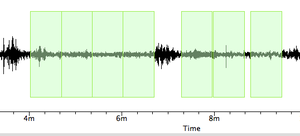
- When the Overlap box is not checked, contiguous selected signal windows will not overlap.
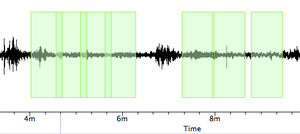
- When the Overlap box is checked, contiguous selected signal windows will overlap by a chosen percentage entered in the neighboring spin box.
Bad Sample Definition and Use
It is possible to discard higher amplitudes when looking for stable windows, by defining a level of "bad" samples. When a sample value is above the defined "bad" sample threshold it is considered as being above the STA/LTA threshold.
- Bad Sample Threshold box
It is possible to define a level above which a sample is considered as bad, i.e. that should be rejected when defining stable windows.
To do so, check the Bad sample threshold box and enter the desired threshold in the spin box. The threshold is the percentage of the maximum amplitude observed over the entire signal.
- Bad Sample Tolerance box
A maximum number of bad samples may be accepted (tolerated) inside windows during the selection process. Check the Bad sample tolerance button, and enter the maximum cumulative time (in seconds) reached by all the bad sample that is accepted in selected windows.
This option may only be used when the previous option (Bad sample threshold) is checked.
Anti-triggering alternatives and criteria for window selection
The goal of the anti-triggering is to keep the most stationary parts of ambient vibrations, and to avoid the transients. Eventualy, user's defined bad sample are also considered as part of the non-stationary signal.
Two types of anti-triggers may be applied to he signal, both based on STA/LTA detection.
- Anti-triggering on raw signal
When the Anti-triggering on raw signal box is checked, the anti-trigger is applied sample per sample all along the entire signal, using the STA/LTA parameters entered in the Raw signal sub-tab.
- Anti-triggering on filtered signal
When the Anti-triggering on filtered signal box is checked, the signal is first filtered using the parameters entered in the Filter sub-tab, and then the anti-trigger is applied sample per sample all along the entire signal, using the STA/LTA parameters entered in the Filtered signal sub-tab.
All combinations of box checking are possible, including both boxes unchecked or checked. In the latter case only samples that fullfill the criteria of both antitriggers are considered as part of a stable signal. When none are checked no anti-trigger is apllied in the window selection.
It is thus possible to select windows based on the Bad Sample criteria only, or even no criteria.
IMPORTANT NOTICE: when using the anti-triggering on the filtered signal, the signal is filtered ONLY to select stable windows.
The processing is then performed on the RAW signal.
In order to process filtered signal the raw signal should first be filtered with the Filter in the Waveform menu.
Raw Signal sub-tab
This sub-tab is divided into two sections.
- STA/LTA parameters section (to the left), includes STA length, LTA length, as well as minimum and maximum STA/LTA thresholds (more information).
- Apply to section (to the right), indicates to which tracks the anti-trigger is applied (top, above the … : e.g. Vertical, North, East) and to which file (bottom underneath the … : e.g."Strong Peak").
Simply check the boxes of the tracks and files that are to be processed.
Filter sub-tab
Contains the filtering parameters used in the Filtered Signal sub-tab (more details).
Filtered Signal sub-tab
This sub-tab is divided into two sections.
- STA/LTA parameters section (to the left), includes STA length, LTA length, as well as minimum and maximum STA/LTA thresholds (more information).
- Apply to section (to the right), indicates to which tracks the anti-trigger is applied (top, above the … : Vertical, North, East) and to which file (bottom underneath the … : "Strong Peak").
Simply check the boxes of the tracks and files that are to be processed.
Widowing and data flow sub-section
Two boxes and one pop-up menu located at the bottom of the Time windows section are used to control windowing and real time data acquistion flow.
- Update box: should be checked when using geopsy for real time data acquisition. Checking the box when no data flow is entering as no effect on the processing.
- Common box: check this box to force selecting the same windows on all signal tracks, i.e. STA/LTA threshold must be verified simultaneously on all tracks in order to keep a window. When the box is unchecked, STA/LTA threshold must be verified on each track taken separately. There is no need to check this box in H/V processing, as in this case it is automatically applied.
- Select pop-up menu: used to determine which action is undertaken in the windowing process.
Auto: windows are selected automaticaly using the criteria of the General sub-tab of the Time section.
Add: manualy add windows.
Remove: manualy remove windows.
Inverse: select the windows that were previously not selected. When no windowing has been performed, applying Inverse will select windows all long the signal without applying the criteria of the General sub-tab of the Time section.
Clear: remove all windows.
Load: load windows from previous processing stored in a name.log file.
